About The Project:

The airplane is a home-built, scratch-built Zenith CH 750 STOL. Building from plans/blueprints is a challenging way to build an airplane, since most of the parts you use to build it are not prefabricated. I chose the Zenith CH 750 STOL for its rugged design, its STOL (Short Take-Off and Landing) characteristics and its aluminum construction. Zenith Aircraft Company has designed this airplane so that it can be built from scratch or from a kit by the average person. They provide excellent technical support for both kit and scratch builders. In addition, I'll be installing a 1965 Chevrolet Corvair 164 cid horizontally opposed, air cooled, 6-cylinder engine, with special conversion parts to make it suitable for airplane duty. This is what the airplane will look like when I'm done, although I'll have a different paint scheme:

Follow my progress below!

Friday, September 16, 2016

Flaperon Skeletons

Friends,

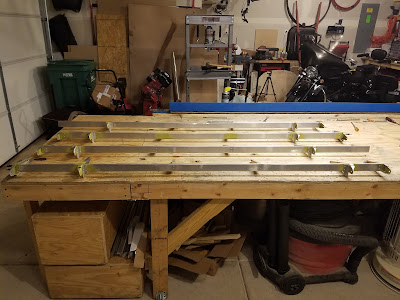
Prior to starting the Horizontal Stabilizer build, I actually completed the Flaperon Skeletons. I riveted them together prior to skinning, which I'm not sure was a good idea. I'll still need to de-burr the rivet holes for the skins, but I think I can manage that with the skeletons assembled. I did not go that route with the horizontal stabilizer, though. Anyway, here are the skeletons primed and riveted. I need to fix one hinge bracket/nose rib combo due to an alignment error. It will require making a new bracket and nose rib, and match drilling them to the existing hole in the spar. If I mess that up, I'll have to build a whole new flaperon skeleton.

 Close-up of Flaperon Skeleton with inboard control horn:

All 4 flaperon skeletons. 2 each make up each flap/aileron combo:
 

I didn't shoot much video or photos for these parts, though I do have some video footage of assembly. More on that later...

Cheers!

Horizontal Stabilizer Build

Friends,

Here are a few photos from my horizontal stabilizer build. I've been working on it for about 3 weeks. In the process, I've had to re-make all of the mounting brackets for various reasons, which I'll detail below. I'm working on an assembly video, and I've already started the skinning process, but I'll have a separate blog post on that.

Horizontal Stabilizer Brackets:
 
 I actually had to re-make these parts for 2 reasons. The first reason was that the drawings were incorrect on the large mounting bracket. 30mm is supposed to protrude from the bottom of the rear spar for attachment to the fuselage. Although my spar and bracket were perfect, according to the parts drawings, the assembly process revealed that the bracket was 4-5mm too short! I have no idea why, and you couldn't simply move the bracket because it would miss a critical row of rivets. I made the part 5mm longer and it solved the problem. The 2nd reason I had to re-make the other parts was a simple assembly error on my part. I drilled the hinge gusset in the wrong place because I didn't examine the drawings correctly. Oh well. It only took an hour to re-make all 3 brackets/gussets. But still...

 Horizontal Stabilizer Skeleton without brackets:

Close-up of nose rib attachment:

Wide view of skeleton with tip ribs attached:

Overall, the skeleton build went very well. Everything was relatively easy to square up and get match drilled properly. On to the skin...that has proven to be a much bigger challenge!

Cheers!